


With Aloware’s native Salesforce integration, you get click-to-call functionality, automated contact syncing, and real-time activity logging—right where your team already works. Whether you're managing inbound leads or making outbound calls, Aloware’s Talk dialer embeds directly inside Salesforce for a faster, smarter calling experience.
This step-by-step guide walks you through how to set up the integration and make the most of its powerful capabilities.
Step 1: Install the Aloware Package from Salesforce AppExchange
Start by logging into your Aloware account and navigating to the Integrations tab. Find Salesforce, then click Settings to access the general configuration screen. From there:
- Click Install Salesforce Package – this redirects you to the AppExchange.
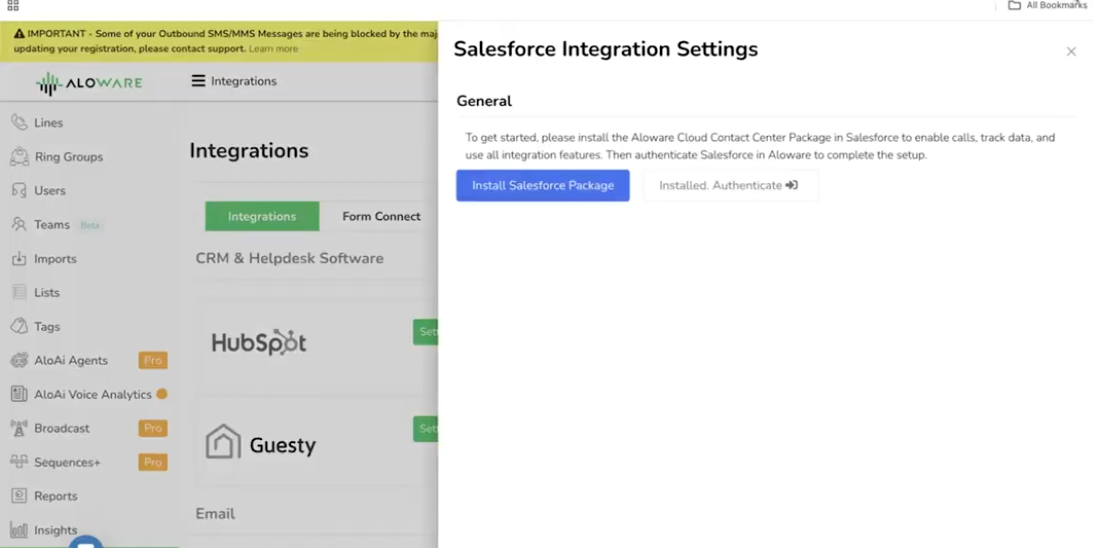
- Search for Aloware Cloud Contact Center, then click Get It Now.
- Follow the prompts to install the package to your preferred Salesforce instance.
- After installation, return to Aloware and authenticate the connection under the Salesforce Integration tab.
Once authentication is successful, you’ll see confirmation in your Aloware dashboard.
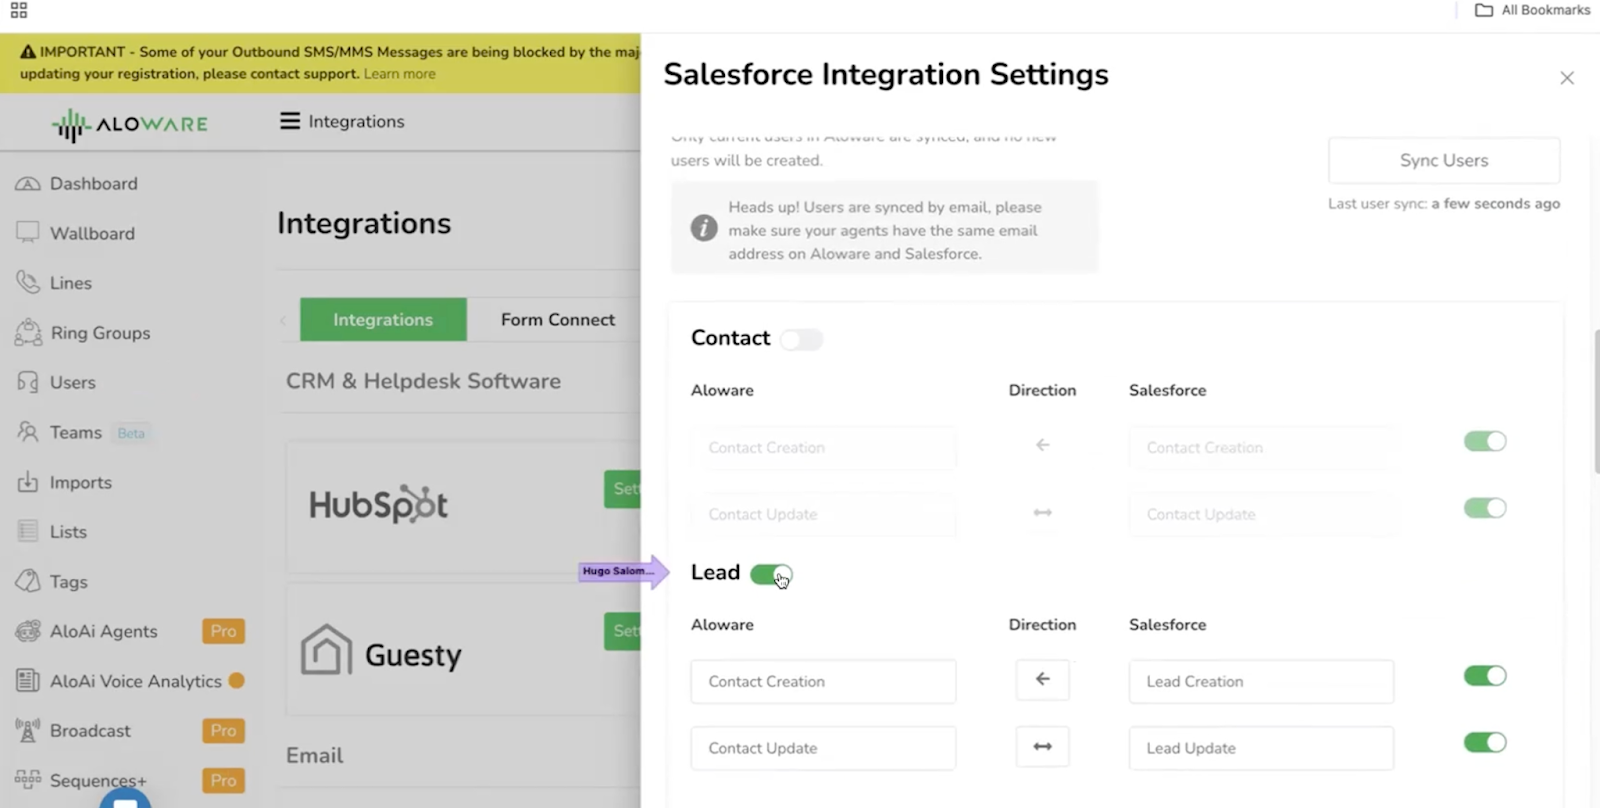
Step 2: Choose Lead and Contact Sync Settings
By default, Aloware begins syncing Leads from Salesforce. If you prefer syncing Contacts instead, you can toggle the setting. You can also:
- Enable or disable automatic syncing.
- Manually force a sync by clicking Pull Salesforce Leads—useful for updating records immediately if there’s a delay.
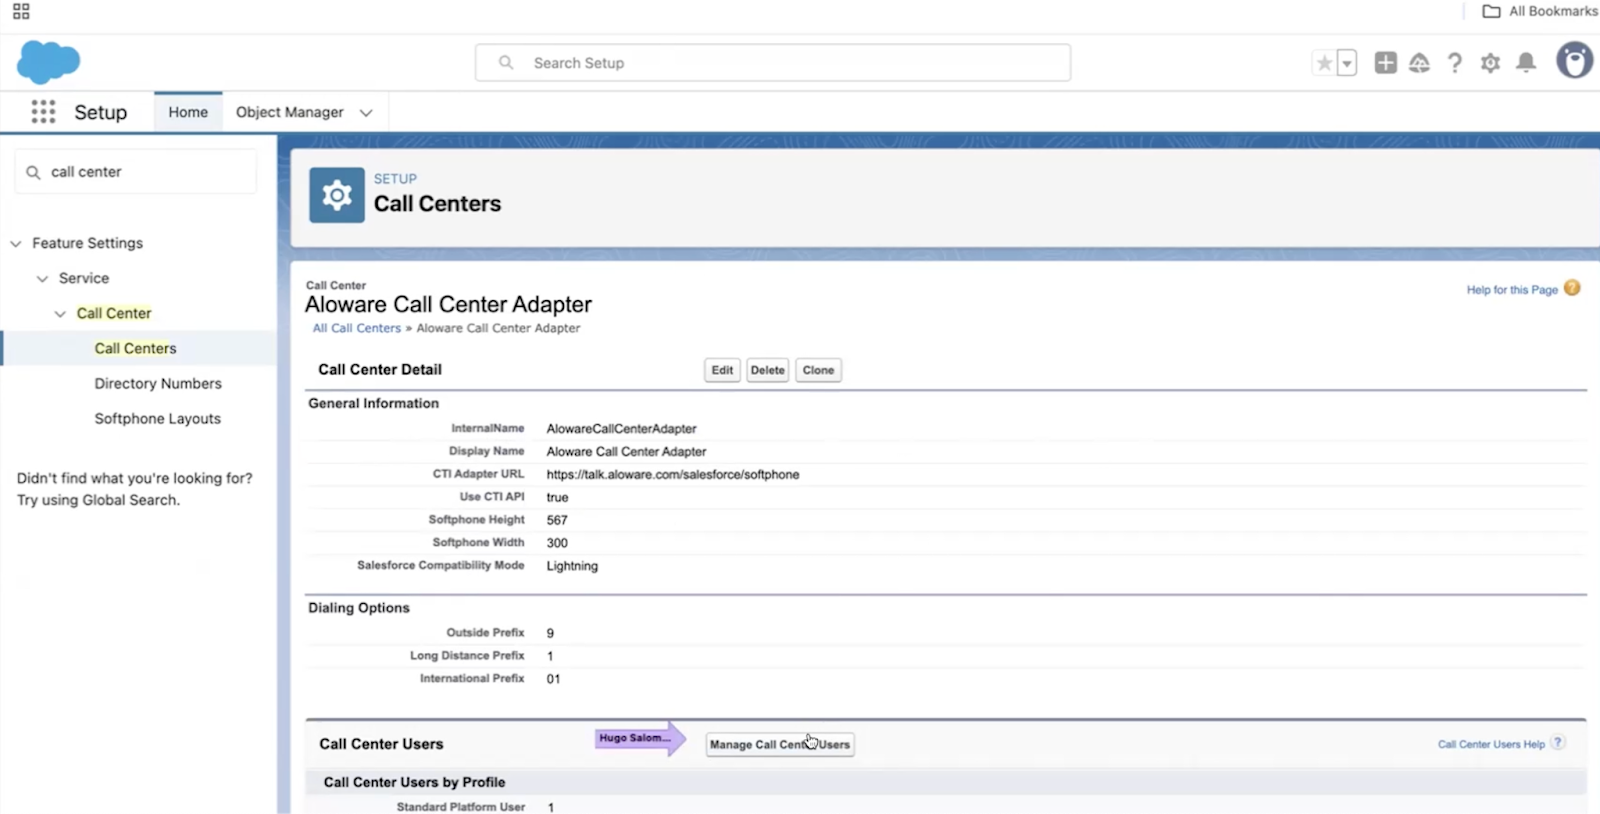
Step 3: Enable Click-to-Call with Aloware’s CTI Dialer
To enable the click-to-call feature inside Salesforce:
- Download the Call Center XML file from the Aloware integration settings.
- In Salesforce, go to External Client App Manager under the App Setup section.
- Ensure the Aloware Client App is enabled.
- Search for and select Call Center, then import the XML file you downloaded.
- After importing, manage users by selecting the Call Center Adapter and adding or removing users accordingly.
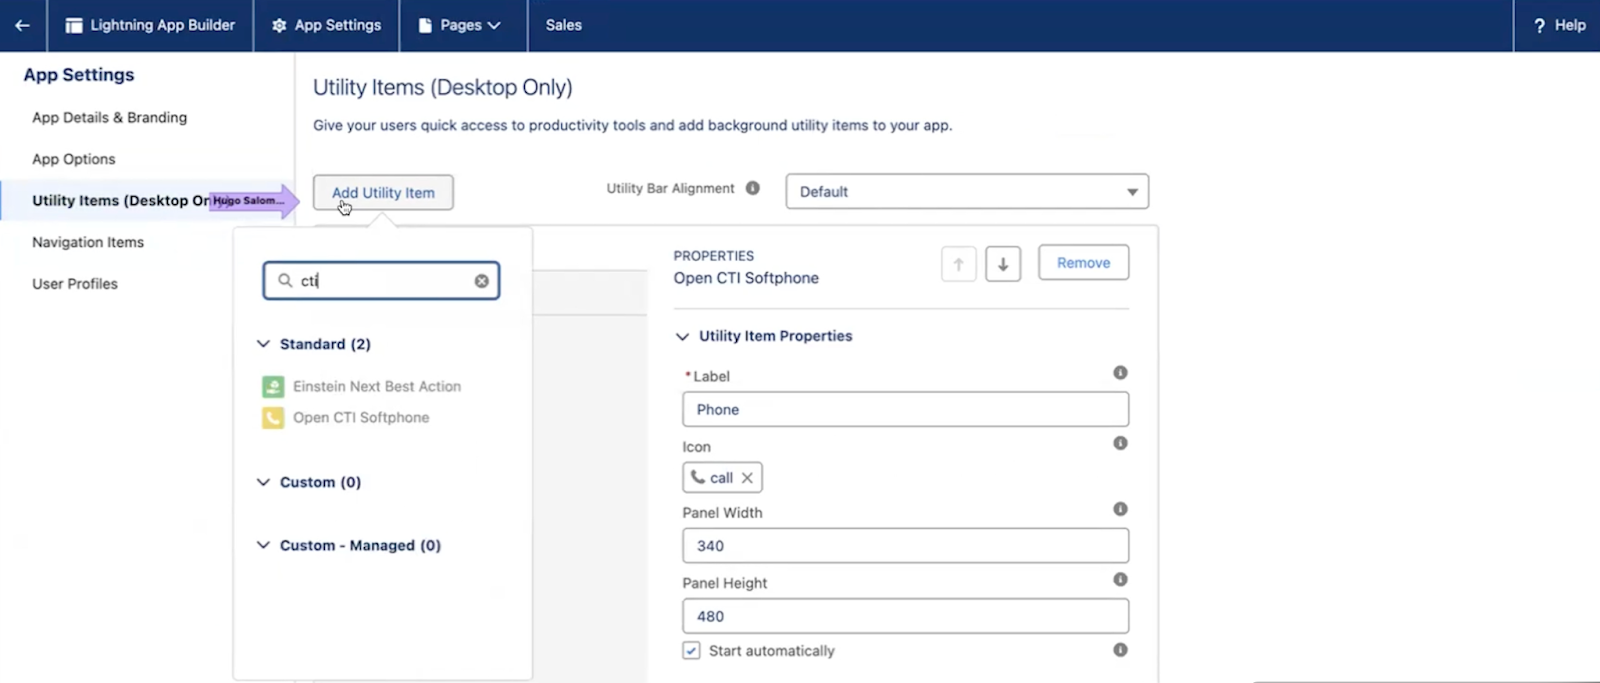
Step 4: Add the Aloware Dialer to Your Salesforce Console
To activate the dialer within your Salesforce UI:
- Search for App Manager in Salesforce and locate your desired app (e.g., Sales or Sales Console).
- Click the dropdown arrow next to the app and select Edit.
- Add a new Utility Item and choose CTI Soft Phone.
- Save your changes. This adds the Aloware Talk dialer to your Salesforce interface.
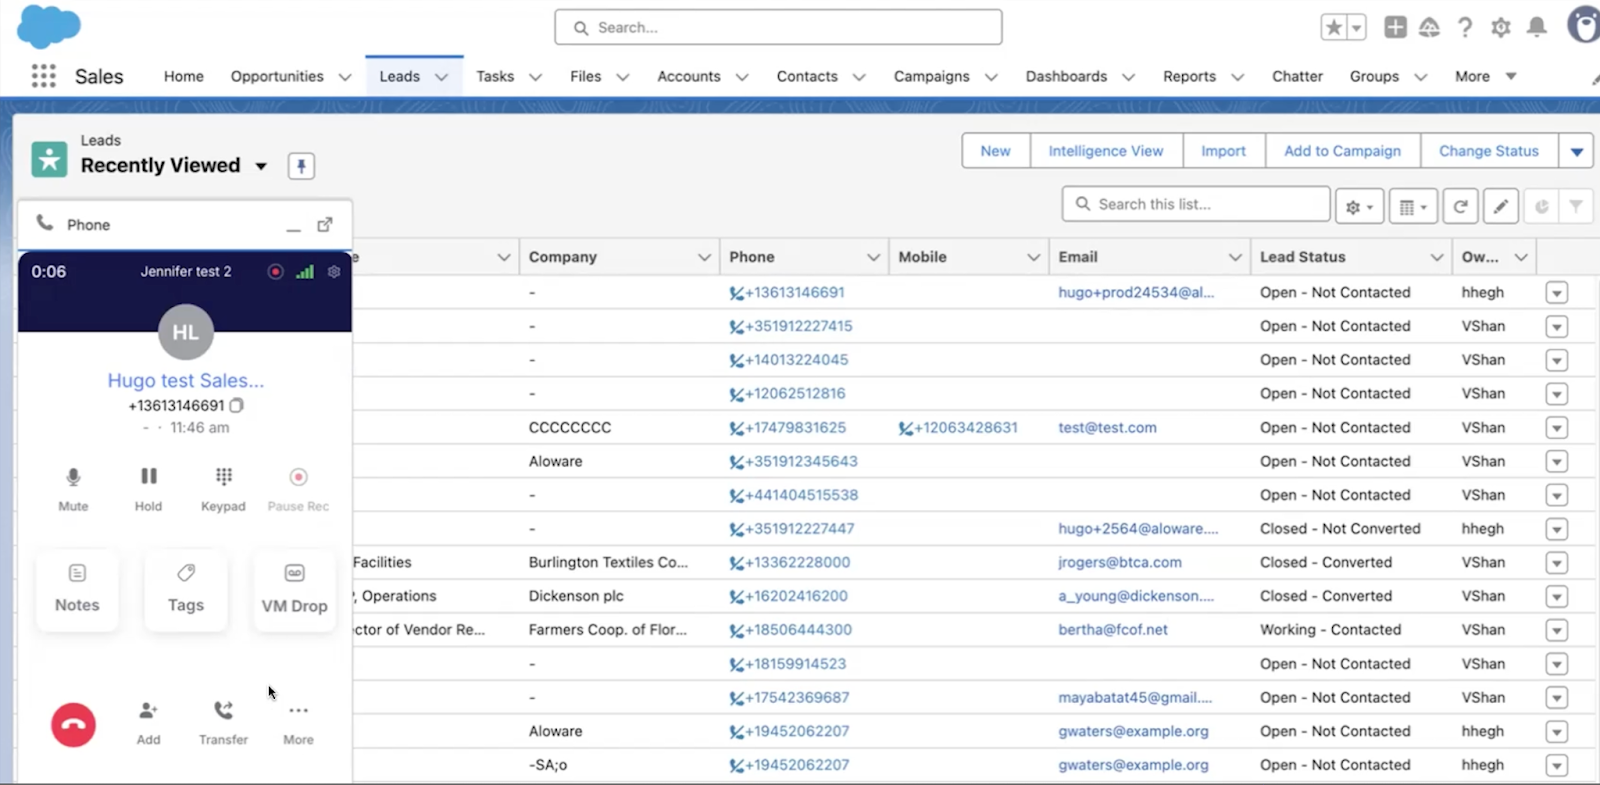
Step 5: Click to Call and Start Using Aloware Talk Inside Salesforce
Once setup is complete, go to your Salesforce Leads tab. From there:
- Click on any phone number to initiate a call using Aloware’s CTI dialer.
- The dialer will prompt you to log in to Aloware the first time, then launch automatically afterward.
- Enjoy full access to Aloware Talk features—including call notes, tags, voicemail drops, transfers, and more—directly inside Salesforce.
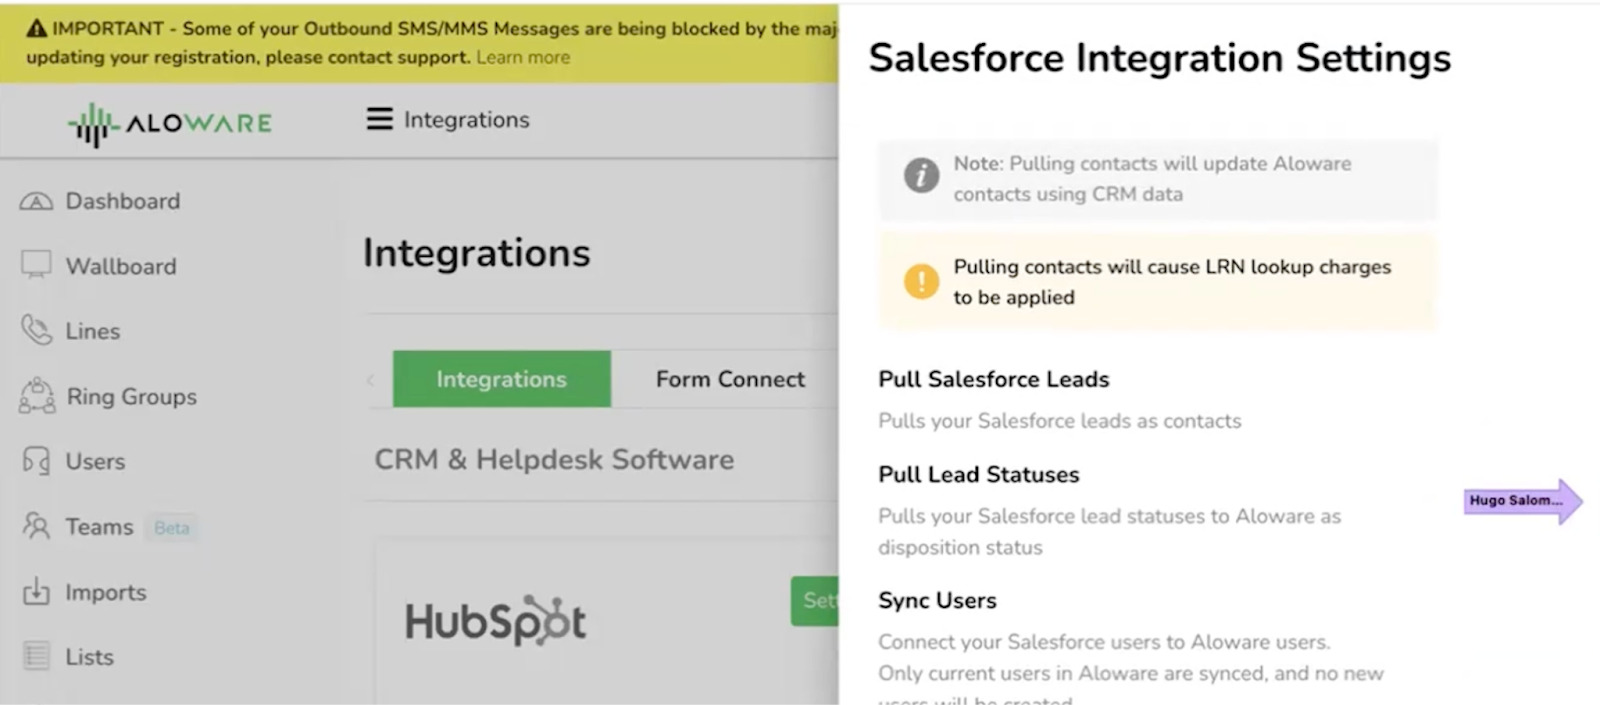
Step 6: Sync Dispositions with Salesforce Lead Status
Keep your CRM up to date by syncing Aloware contact dispositions with Salesforce lead statuses:
- In Aloware, navigate to your Salesforce integration settings.
- Click Pull Lead Status to import your current Salesforce status values.
- Map Contact Disposition fields in Aloware to Lead Status fields in Salesforce.
- Enable bidirectional syncing so updates flow both ways between platforms.
This ensures that every call outcome logged in Aloware reflects in Salesforce automatically—and vice versa.
Conclusion
The Aloware + Salesforce integration empowers your team to call faster, log smarter, and work seamlessly between platforms. With native click-to-call, real-time lead syncing, and deep CRM integration, your reps can focus less on admin and more on what really matters—closing deals and serving customers.
Need help getting started? Book a meeting with our team.